This weeks assignment started with making quick sketches for a charity event flier. Being that I find it difficult to process things unless they are real, I decided to use the upcoming charity event my husband is in charge of as a focal point.
The audience for the event is families. This is a fun walk that benefits the local Alaska Hemophilia Chapter and helps raise money for their programs aimed at educating and providing support to families who have bleeding disorders. The main color nationwide for this organization is red, so I decided to use red as a starting point for my project.

This was a draft of my initial idea. I used a monochromatic color scheme in the red pallet. While my husband really liked this simple version, I didn’t think it targeted families very well and didn’t really use any images, other than the clip-art ribbon. I then decided to try one of my other layouts.

This is the initial layout of my final working document. I decided to go with a Split Complementary color scheme using red, teal and orange color swatches. I then used photos provided by Alaska Hemophilia Association that were taken during their first walk to bring excitement into the flier and gather community recognition. I originally picked a textured teal background but quickly got rid of that as it was too overwhelming and made it very difficult to read the text.
Working in Word was much easier this time. After watching several YouTube videos I decided to use a drawing canvas to anchor my background to the page, so I was no longer chasing it around the page as I played with moving my images. I then filled the canvas with my background color from the teal section and added a gradient feature.
The initial design that inspired this layout had a picture as a top border. I wasn’t successful in inserting a photo of people across the top as it was too distorted. I then tried a second red border at the top and it was to overwhelming. After those decisions didn’t pan out I decided to start the flier with the national walk logo in the upper left corner and then let the pictures cascade from it leading you down through the flier.
My favorite picture from the walk is the large middle image. I selected it because it had the name of the walk on the life preserver and the girls had their faces painted. I picked this image to be the biggest because of how well it represented the event. I inserted all the photos by drawing a shape and then using the fill option to select a photo as the fill. I picked a circle because it repeated the life preserver and had a better flow through the flier. I then outlined them in the red from the bottom border.
I drew blank text boxes to insert the body text and title. I chose to have the text orange as a contrast element and to pull out the third color of my color scheme. The individual logos are jpegs inserted as fill into rectangle shape boxes.

This is my screen shot of me putting into action the changes that were recommended during my critiques. My first critique was by Sister Peterson during our class video on Wednesday in the Adobe Connect room. She recommend breaking up my title and making sure that everything was aligned with something. She also mentioned that the bottom copy was hard to read and the last picture was not scaled properly. She also thought the gradient on the background was a bit much.
I also received critiques from Matt, Jessica, Ben and Daysi over the group Facebook discussion board. It was obvious that the text was a little hard to read and that bottom picture was really bothering people. Other suggestions were to make sure that everything was aligned with something and designate the items in the list with bullets.

So here is the final copy of my project. I implemented most all of the recommend changes I received in my critiques. I stayed with a teal background, but selected a lighter color and less gradient. I picked a deeper red swatch for the borders and then made it more transparent. I next switched the color on the text in the read border to white (which turned out to be in keeping with the National Hemophilia Association’s publications.)
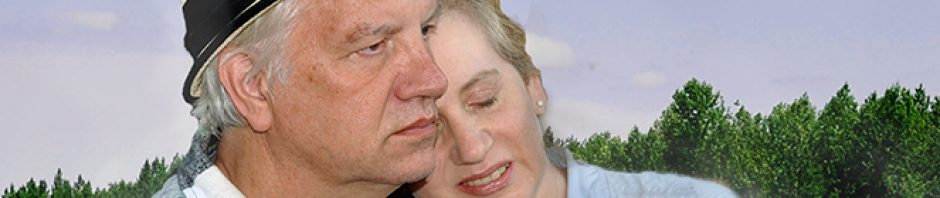
Next after several attempts to fix the bottom picture, I decided to scrap it in favor of another image from the Association that shows one of the young patients learning how to administer his medication to his teddy bear with the clinic nurse helping him. This image was provided by the association and under a written release to be used for publications and advertisements. I thought the image added to the overall message that this walk is to help families with bleeding disorders.
I next modified my body text to implement a little of the AHA mission statement into it.
I also modified my Title and took Sister Peterson’s suggestion to play with the font size and shorten it. I lined the top line of the title with the quote marks of the Wild using a guide line. This line also allowed me to line up the Baxter logo with the DTP text and the Donate in the bottom line. I also changed the color of the body text to the new red to allow for more contrast between the body and the title. I used another guide line to let me line up the third line of the title with the end quote mark and all of the body text in the lower portion. I also used a guide line to verify that the AHA logo and the edge of the picture were in alignment with each other.
Image sources: Direct photos provided by Alaska Hemophilia Association and authorized by personal releases to be used for advertising purposes.
Baxter logo via: http://www.hemophilia.org/walk/fundraisingKit.html
Color Scheme: Split Complementary, Color Swatches Red, Orange and Teal
Fonts: Title – Cooper Black, Oldstyle Serif in extra bold weight ; Body – Lucida Sans, Sans Serif
I had fun practicing and trying to get this flier perfect. Hope you enjoyed it.

You did a wonderful job. I like the fad of the color. The placing of your words with the picture is great. Very professional. Nice job with the three colors. https://comm175regina.wordpress.com/2015/05/22/50/
LikeLike
This turned out really good. I especially liked the way you walked us through your process with each picture. That is great! The way you aligned you body copy works really well with the rest of the piece. It makes it look sharp and organized. Great work.
LikeLike
Walk on the Wild Side turned out Great! The picture you replaced works very well with the rest of the flier. Good Job! Bravo! Here’s my flier: https://ruskeportfolio.wordpress.com/
LikeLike
Your final design turned out great! I think your application of all the critiques really made for a more esthetically pleasing design. I really like the alignment better in your final design. It just “feels” better. I also really like your bubbles and pictures and how they slight overlap to “break barriers.” The final title also stands out so much better and is easier to read. Great job on your design process! All your work really paid off. If you want to check out my final project you can at https://jessashtondesign.wordpress.com/2015/05/22/event-flier-project/
LikeLike